 Contact Us Contact Us
| How To Correctly Size and Fit Your Donjoy Knee Brace25 May 2022 When it comes to sports knee braces, Donjoy Armor are the at the top of the game, providing high-quality support and protection for athletes with a hunger for victory. They're designed to enhance the users' safety and give them the confidence to perform without risking injury, but if the supports aren't properly fitted with accurate sizing, their protective benefits won't work as intended. That's why its crucial to ensure you have the right size before buying, and that you know exactly how to fit the brace once it arrives at your door. At KneeSupports.com, we want to make sure you're getting the level of protection you deserve, so we made this step-by-step guide on How To Correctly Size and Fit Your Donjoy Knee Brace. Which Knee Braces Are These Instructions Made For?These sizing and application instructions apply to the following Donjoy Knee Braces:
Sizing Your Knee BraceIt's quick and easy to size the Donjoy Armor brace, with three measurements to be taken from the thigh, knee and calf. The three necessary measurements are described in more detail below.
Find Your SizeOnce you've got all three measurements, its time to find exactly which brace is right for you. Match your measurements to the corresponding sizes below, and follow our extra sizing tips to guarantee you pick the right size.
Extra Tips For Sizing
Before FittingOnce you've properly measured your leg at the thigh, knee and calf, and have ordered the right size for you, you're ready to try your brace on and feel the support for yourself. But before you begin, we've compiled a few key tips to help your application go as smoothly as possible:
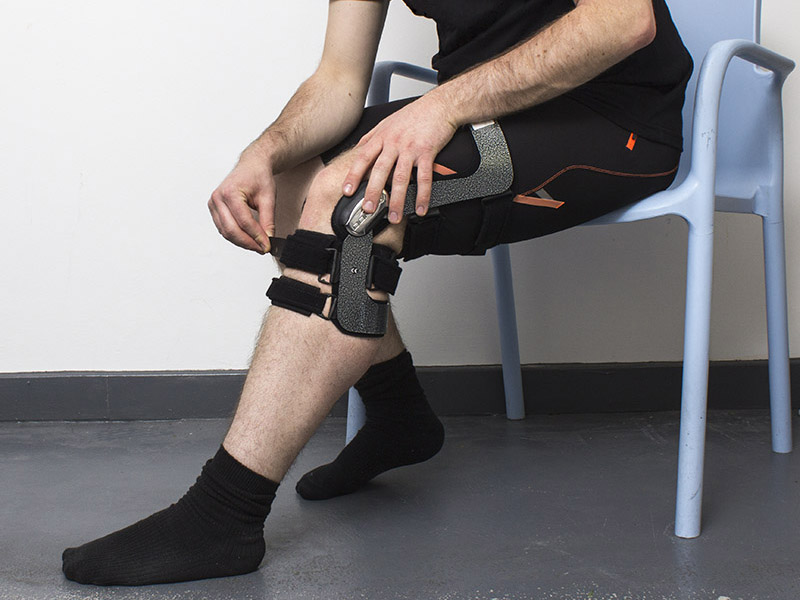
Step-By-Step Knee Brace Application InstructionsNow that you're prepared for proper application of your knee brace, we've prepared a step-by-step guide to ensure the perfect application, every time. Step 1: Initial PreparationA. To start off the application, sit on the edge of your firm surface in a stable position. B. Ensure that your knee is slightly bent (45°), and your foot is placed flat on the floor (Figure 1).
Step 2: Brace and Hinge PlacementA. Now that you're seated in the proper position, undo the straps and step through the brace (Figure 2A).
B. Holding the brace by the hinges, centre the hinges 1 inch above the top of your knee cap. C. Then, push the hinges slightly back behind the midline of the knee (Figure 2B).
Step 3: Anti-Migration Band PlacementA. Secure the anti-migration calf band around the leg with a snug fit. Make sure this band is in full contact with the leg and does not wrap around the outside of the brace (Figure 3). Please note that the anti-migration band is not designed to be threaded through any plastic buckle and should wrap directly around your leg.
B. Please note that the anti-migration band is connected to both Strap #4 and Strap #5. Neither of these straps should be fastened until later on in the fitting process. Step 4: Secure Straps #1 and #2A. Secure the strap #1 (which is the lowest strap on the calf) until it has a snug fit (Figure 4A).
B. Secure the top thigh strap #2, but not too tightly, as that can cause the brace to slip down your leg (Figure 4B).
C. Again, following this step, push the hinges slightly back behind the midline of your knee. Step 5: Secure Straps #3 and #4A. Secure the lower thigh strap #3 until you feel a snug fit (Figure 5A).
B. Secure upper front calf strap #4 until it is very snug. (Figure 5B). Strap #4 can be found at the front of the anti-migration band and should be threaded through the loops on the band. This step is especially critical for patients with ACL injuries.
Step 6: Securing Strap #5A. Secure the back calf strap #5, which again is connected to the anti-migration band, until is has a comfortable fit (Figure 6).
B. After the initial fitted of this strap, you do not need to undo it. It will work to keep the anti-migration band in place. Step 7: Check your Fit and Re-TightenA. At this point, your brace should fit snugly to your leg. OA patients should feel a slight push on one side of the knee. If you have done this correctly, your brace should now be fully fitted (Figure 7).
Additional Troubleshooting TipsIf you've followed these instructions and still find that your knee brace doesn't fit as well as it should, here are some extra tips to help you out. 1: Ensure Proper Hinge PlacementA. In a perfectly-fit knee brace, the hinges will be at the midline of your knee. The pads will be making full contact with your leg. B. If the hinges of your knee brace are too far forward, you should loosen all the straps to allow for adjustment. Then, you can push the hinges back while raising them slightly up. After you've done this, retighten all the straps and re-evaluate your fit. 2: Ensure Proper AlignmentA. On a well-fit knee brace, the hinges should be slightly higher than your knee cap. The pads will be making full contact with your leg. B. If the brace is too low down your leg, loosen all the straps. Then, raise the hinges up your leg, re-tighten the straps and re-evaluate your fit. 3: Ensure Proper FitA. If no mistakes have occurred during the sizing process and your knee brace fits correctly, there will be no major gaps between the brace and your leg. The pads will be making full contact with your leg. B. If the brace you have selected is too large, you can add extra condyle pads to improve your fit. Alternately, you can call us at KneeSupports.com to discuss a replacement with a more appropriate size. 4: Try AgainThe Donjoy Armor Knee Braces are highly technical, meaning it can take some time getting used to application. If you've followed this guide and found the brace ill-fitting, it doesn't necessarily mean that you have purchased the wrong size. Go back to step one and try fitting the brace a few more times to make sure you have a good grasp of the application process. Check out our full range of Donjoy Knee Braces today at KneeSupports.com, with free UK delivery on orders over £40. Have any questions or anything to add? Tell us in the comments below! | ||||||||||||||||||||||||||||||||||||||


Secure online payments    Secure payments taken online. |